Softimage|xsi - Tutorial
Use of the interface (ToolBar)
Creation of simple scripts
The goal of this tutorial is to understand how to create/use toolbars and
scripts.
(The toolbar creation will work in XSI 1.0
The scripts will only work in XSI 1.5)
Author: Patrick
Vier
E-mail: kenjaman@kenjaman.net
Translated by: EdHarriss
Website: www.EdHarriss.com
SCRIPT CREATION
Get a cube: Get>Primitive>Polygon Mesh>Cube. With the cube still
selected click the "Selection" button in the MCP. A small explorer
will open up. Click the "Geometry Approximation" Icon. Answer "YES"
to the "Confirm Make Local" dialog box and the "Geometry Approximation"
property page will open.
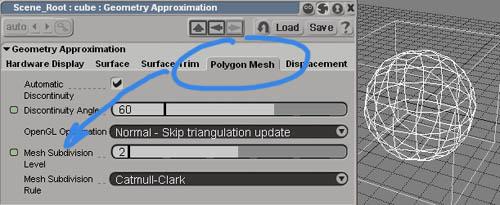
Click on the "Polygon Mesh" tab and change it's "Mesh
Subdivision Level" value to 2.
Open up the Script Editor by clicking on the "!" button .
![]()
Select the line that begins with "Set Value" and copy/paste it into
the script area (lower part) of the editor.
Change the number 2 to a number 0.
Validate the script by clicking the Run button.

Notice that the subdivision of the cube returns in its original state.
Erase the line you just copied.
Copy and paste (Or select and Drag and Drop) this script into your script editor.
Note : The lines starting with one ' are remarks.
Check your Script by replacing value "0" with "1", then
clicking "Run".
... Now that you've got a script that works. It's time
to turn it into a button and put it on a toolbar..
We will create a ToolBar, then customize it according to our needs.
TOOLBAR CREATION
Create a tool bar with View>Custom Toolbars>New Toolbar.

Give it a name and click ok.

Click "View>Custom Toolbars>Customize"
Then, in the "Customize Toolbar" property page, choose the
ToolBar category.
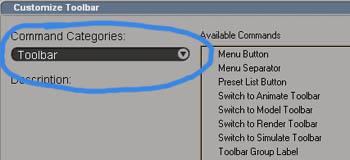
In this property page, Drag and drop the text that says "ToolBar Group
Label" onto your newly created ToolBar and name it "Subdiv Poly".
In the script editor select the script and drag and drop it onto your toolbar.
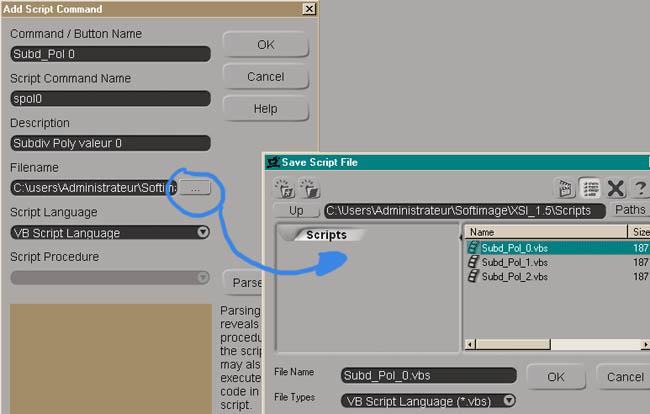
The "Add Script Command" property page will open up.
Give your script a button name.
You can change where it gets saved if you like.
Then Click, OK, OK.
Now we will create more buttons for higher Subdivision Levels.
In the Script Editor, change the values "0" to "1" like
below.

Drag and drop the "changed" script onto the Toolbar like you did before,
but give your button a name that reflects the change that you made in the script.
Repeat the process using a number "2" instead of "1"
You can go up incrementally till you feel you've got enough subdivision buttons.
From the "Customize ToolBar" property page (Toolbar category),
DragAndDrop (DAD) Tool Group Label and call it Polygon Tools.
In "Customize ToolBar" select the Modeling category.
DAD "Add Polygon Tool"
DAD "Add Edge Tool"
DAD "Set Edge Crease Been worth"

You can also "DAD" various functions which may seem useful
to you for Modeling...

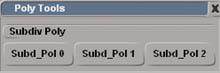
Select the cube in Object mode, and click on the button "Subd_Poly
1"... then on the button "Subd_Poly 0".
Now you can work on the low res model while getting feedback on the HighRes
model. Then switch back and forth between various resolutions.
FOOT-NOTE: When Poly modeling, you always have access to a contextual menu.
Click the right mouse button on the selected part (see below)
