Apply an image with a Alpha channel
by Stefan Andersson
Synopsis
This should have been an easy task, but somebody made a mistake on
how to incorporate this feature. Many people have been asking about this
(at least here at the studio). So there for the function is not complete
or understandable. This should also be one of the most basic functions
in XSI, but have become osomewhatf a nightmare. So... to the developers:
Look at Softimage|3D 3.x and see how it works there!
Note this hole material tutorial takes place in the RENDER module,
so you can press 3 right now.
The bottle
So I've made a bottle in which I'm going to have my beer that I just
made. I also made a label for my new beer. The object is a NURBS object
but I'm going to use a cylindrical projection anyway (easier to place
the label).
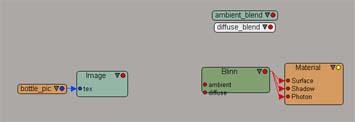
First, select your object and go to Get -> Material -> Blinn.
The default values is OK for now.

pic1. the beautiful bottle
With the object still selected go into the rendertree and press update.
You should now see this:
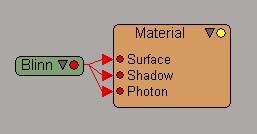
pic2. the applied material without any images
Lets apply the image and place it where we want it. With the object
still selected, go to Texture - Image.
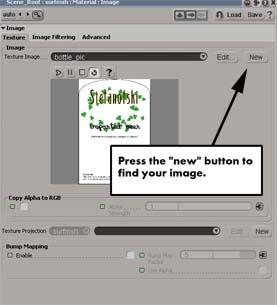
pic2. The image node
Press the "New -> New from file..." button to find your image. And
then, find the "new" button for the texture projection and select UV. You
can now scale the texture support object in Y and X so that the label has
the right height. Then translate it in Y to place it correctly.
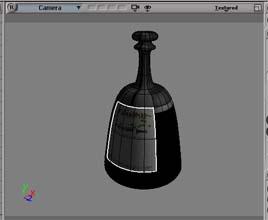
pic4. Bottle with image.
Now take a look at your rendertree. Select your object and press update.
Should look like this:
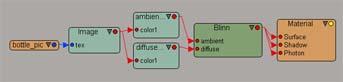
pic5. The rendertree
What do we not need? Well, the ambient and diffuse nodes are totally
useless. Drag the red arrow head away from them and the Blinn node. Drag
the aside so that you don't get annoyed by them. WHAT EVERY YOU DO, DO NOT
PRESS UPDATE (did you get that?).
Rendertree should look like this:
pic5, rendertree under construction
We now need to also disconnect the Blinn material from the Surface
input. So drag the red arrowhead away from it.
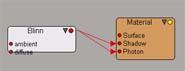
pic7. Blinn disconnected from the surface input
OK, get ready... here comes the magic. Add a node called Mix2Colors
from: Nodes->Mixers->Mix2Colors. Drag the red dot on the Blinn
node to the Mix2Colors and select the "Base Color" from the popup menu.
Drag the red dot from the Image node to the Mix2Colors and select Color
1.
Dragging the red dot is also called connecting (or connect) which is
the frase I will from now on use.
Connect the Mix2Colors to the Surface input of the Material Node. Your
rendertree should look like this:
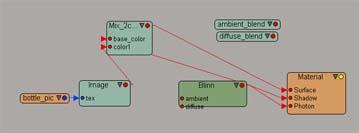
pic8. messy rendertree
Do a render region in your Camera view and you should get something
that looks like this:
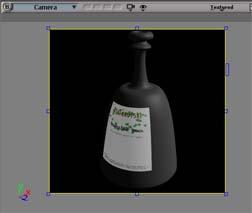
pic9. quick render
Works eh!??! Now open up the Blinn node (double click on it) and set
the transparancy to 0.8 in the RGB value. Your rendered image should look
like this.

You can finaly use your alpha. Simple??