|
Basic Weight Painting | ||
|
tutorial written by Mobi on Sunday 23th
Feb 2003 | ||
|
This tutorial will take you through the basics of
weighting, in particular basic weight painting.
Introduction First get the default male character from XSi, selectall
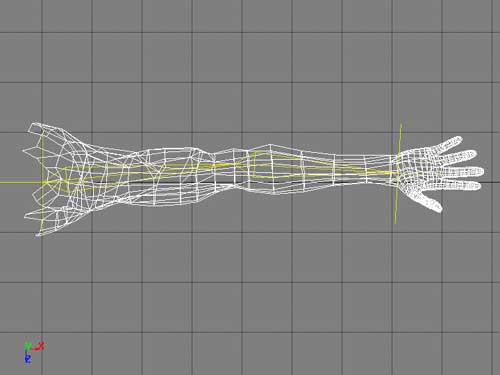
of the body bar the left arm and delete these polygons. Move the arm to
the origin and freeze it. This tutorial was done with XSi 3.01, so your
arm may look different if you are using another version.
Start Create a 2D chain inside the mesh, draw in the top view with the joint toward the back of the elbow,so that the arm bends correctly. Name the root "ArmRoot", the first bone "Bicep", the second "ForeArm" and the effector "IK".
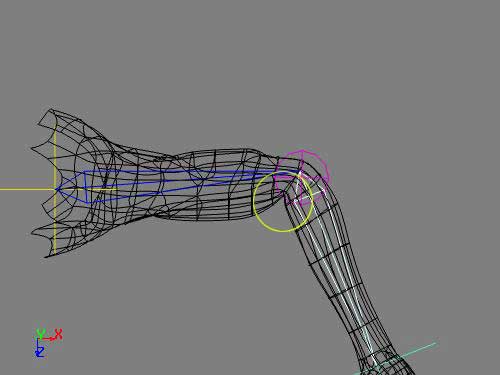
We will be dealing with the elbow joint only in this tutorial, so don't worry about the hand. Get an implicit sphere (Get>Primitive>Implicit>Sphere) and position it at the elbow joint, name it "L-ElbwIMP" and make the bicep bone parent to it. Scale it so it just fills the elbow joint. This will be used to help keep the volume of the elbow as it bends.
Select the arm mesh, then click, Deform>Envelope>Set Envelope and pick the bicep, L-ElbowIMP and the ForeArm. The "Automatic Envelope Assignment" dialogue box opens. Leave "Number of Skeleton Objects" at 2 and "Assignement Method" as distance based.
The "Number of Skeleton Objects" option tell XSi how many object to consider for each point on the mesh. It is best to leave this option as 2 otherwise too many objects are investigated and the mesh may deform more than you want. Distanced Based looks at the 2 nearest bones to the points and assigns them to it.
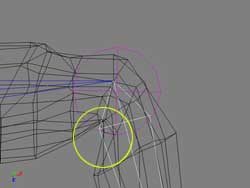
You can see how the elbow crease deforms too far in, the elbow joint loses volume. We will correct this using the weighting tools. Open the weighting control panel by clicking this icon
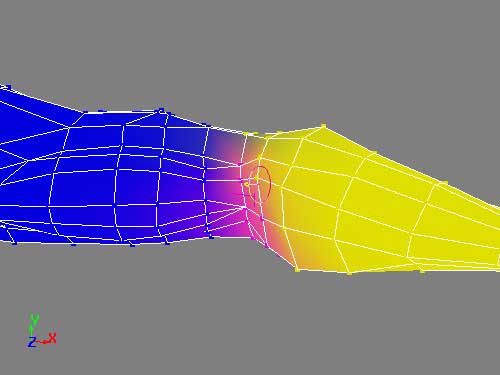
To activate the paintbrush select the mesh and press "W". The view changes to constant shaded and you can see the each skeletal objects area of influence. Each bone is assigned a colour and the spread of the colour indicates its influence.
Don't worry if you have different colour to those shown, the effect is still the same. Where the two colours merge is where the subtle blend of the mesh will take place. If we simple weighted the bicep to half the points and the forearm to the other, we would get a very straight bend that was not smooth and had no volume. With the paint tool still selected, click Deformers>ForeArm from the menu on the left of the screen. This is why naming your skeleton objects is important as you will be clear about which bone you are selecting quickly. The size of the brush represents the sphere of influence of your paint strokes, i.e. how many points are affected. Using the middle mouse button, making sure the mouse is positioned over the mesh, hold the button down and move the mouse from left to right to change the size. Make the brush just big enough to cover one point (about 0.150). Next, change the opacity to 5. the opacity represent the amount of influence the bone will have on the point 0 - none, 100 - full. 5 is a good value to use as you can slowly increase the influence and thus have a more subtle and fine control over the points. Bend the arm to about 45 degrees so you can see the
deformation at the elbow. Drag a paint stroke over a row of point near the
centre of the bend.
The bend is now more even and has more volume. Don't
worry about getting this too exact as once the surface is sub divided, it
will smooth out even more.
This is the same pose as the last image, but has been sub divided - notice how the bend is a lot smoother and crease more naturally. Weight painting is a very quick and powerful tool, look
out for more advanced tutorials coming soon on http://www.ballisticpanda.com/
|


 ::
::