
|
![]()
Now the real work :)
1. open xsi or make a new scene.
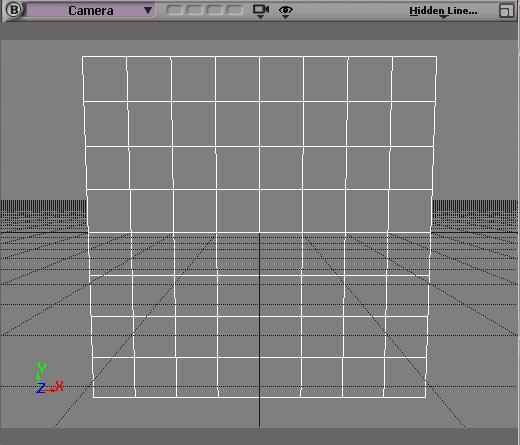
2. create a poly mesh grid from the primitive tab.

3. rotate the grid 90 degrees on the x axes so it will be like this .
4. apply a phong material to the grid.
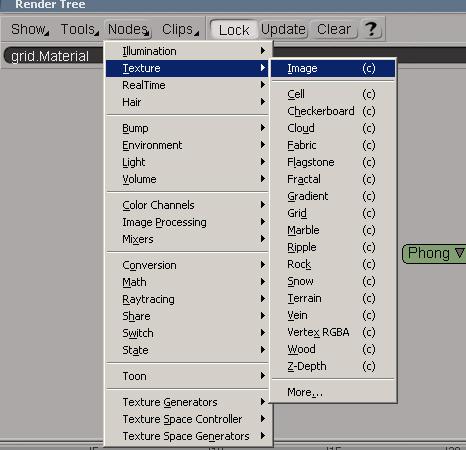
5. open render tree (7 on the keyboard) and pic 2 image texture nodes.
6. pic up mix 2 colors node.

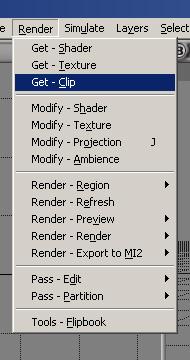
7. now you have to import your image and make it clip, do this from the render drop down text and choose (create clip from file )
locate your file and hit ok .
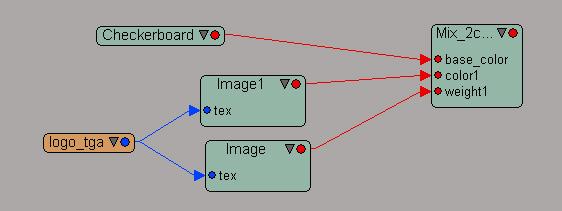
8. now in render tree get the clip and connect it to the 2 image texture nodes you made.
9. get a checkboard texture node.

10. now connect the checkboard node to the base_color input in the mix 2 colors node .
11. connect one of the image texture nodes to the color1 input in the mix 2 colors node .
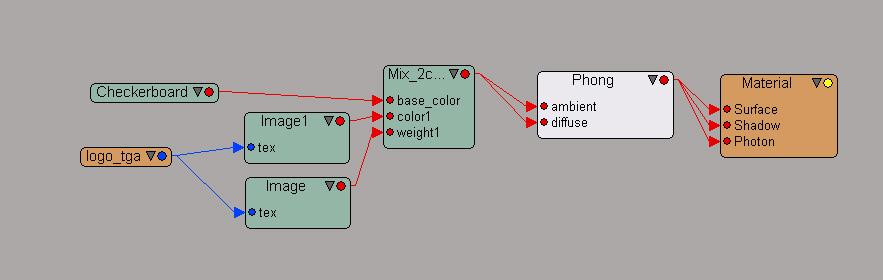
12. connect the other image texture node to the weight 1 input in the mix 2 colors node it should look like this :
13. connect the mix 2 colors node to the ambient and diffuse inputs in the phong shader node it should look like this :
14. now in the camera viewport drag a render region around the grid and this is what you will get :

this is not what we need, to solve this
15. double click on the image texture node that you conectd to the weight input in the mix 2 colors node you will get it's property window
check the copy Alpha to RGB box .

16. drag a render region around the grid again and voila you got your logo over the checkboard texture clean .

Go to part 1
you can get the images i used here
you can get the scene file here
there is a lot more about the render tree in xsi, it is really a great tool and i am trying to master it as much as i can
i hope this would be helpful for some novice people like me
i will try to share more tips in the future but for now keep the xsi world high :)
for any further questions or info contact me at