by Stefan Andersson
Synopsis
Creating a standard setup procedure. It should consists of one thing
only "ease of use". No one should try and 'figure out' how the animation
controls work. One animator should be able to hand over the character to
his/her colleague and with out any spoken word the animator is able to
start animating.
And how do we do this? We use symbols and expression
within the program. We also use a preferred transformation. It's going to
be quite technical but the benefit from it will serve it's purpose. A day
or two extra for setup will gain in "animation freedom". As an animator
you despise all technical bullshit, you just want to animate and not care
about the rest. Writing this was a pain for me, but I learned so much and
gained so much from it, that it was all worth it. Hopefully this will help
my future colleagues to do better groundwork for me.
Because of some limitations in Softimage|XSI this tutorial was made in Softimage|3D 3.9.2. Everything except the transform setup can be made in Softimage|XSI
Symbols.
How do we associate symbols? And what would be the most logical (and space saving) to use? For translations I made arrows and for rotations I used circles (three of them, parented to a null). They are both made of linear splines to avoid being renderble.
note:
remember to freeze the rotations of the splines
when you have rotated them into position
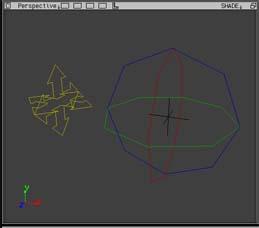
pic 1. Translation and Rotate symbols
As you can see from the color I made the circles red, blue & green
to reflect the different axis (Red=X Blue=Z Green=Y). It's also important
that these are separate object so that you can save keys in only the axis
that you are animating. For other translations or rotations you can also
use triangles.
Remember to make the circles children of a null so that
you can position constraint the null to an object.
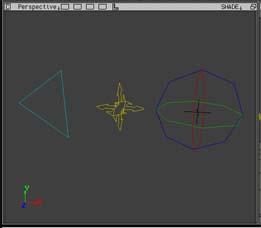
pic 2. With triangle as control object
Try and avoid nulls as controls objects since they don't associate to anything special. For scaling you can use a wirebox that apply to the volume being scaled.
Expressions
Try as much as you can to avoid expressions that makes calculations. It will slow your character setup down. Perhaps not so much for just one character, but if you have five or more you might get into trouble. Also avoid sliders for all kinds of animation with the exception of facial animation. Sliders are bad for you... also your animator will hate you if you give him a setup with hundreds of sliders for every little thing. Remember, we are artists not scientist.
So let's make an example of what kind of expressions we'll use. And our first test object will be the foot.
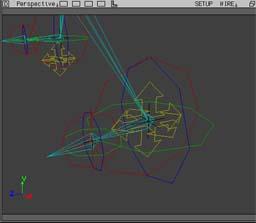
pic 3. Left foot with controls
The end effector of the leg is position constrained to the "move" icon. The parent null for the circles are position constrained to the end effector of the leg. The control circles for the toe are position constrained to the root of the toe bone. First use of any expression is now for the heel bone. The axis for the bone is not aligned with the circles. So you have to figure out which axis goes with which circle (not so difficult).
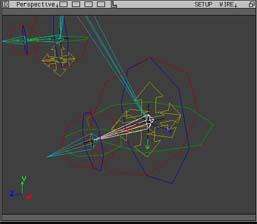
pic 4. Axis of the heel bone
For my heel bone it works like this.
L_Heel.roty = Heel_control_rot_Y.roty
L_Heel.rotx =
Heel_control_rot_Z.rotz
L_Heel.rotz = Heel_control_rot_X.rotx
And your bone might be a little bit rotated to begin with. So you have to take that into count when you apply every expression. Select your heel bone and in the Motion module you go to Expression - Edit
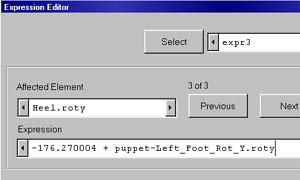
pic 5. expression applied to the bone
Since the rotation on my Y axis was rotated I had to start out with
that value in my expression. Otherwise your bone will flip to it's "0"
value (not recommended..). Then you add a "+" and press the "scn elements"
button to find the object which is going to control this expression. And
then you add which F-Curve that is going to be the driving force.
Apply this for every axis to the bone. If you now rotate the circles
they will rotate the bone. Simple and easy :) Now do the same thing for
the toe bone. You might scale down the circles for the toe so it'll save
some space (and you can tell them apart).
Now for the spine. If you have studied my other tutorial you know that I use something I call a "ass bone". This bone was developed for the purpose of hot "catwalk" scenes and "jiggle the ass" scenes. It gives you much more control over how the hip moves around. So the center of the body is in the waist. That is where the root is.
.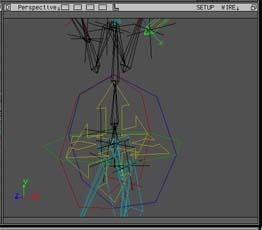
pic 6. the hip and it's controls
The root has a position constraint to the yellow "move" icon. And now for the rotations. Each spine bone has the same kind of expression as the foot bone. The difference now is that with one rotation you bend the hole back. The "ass bone" has a wirecube that controls the rotation of the bone.
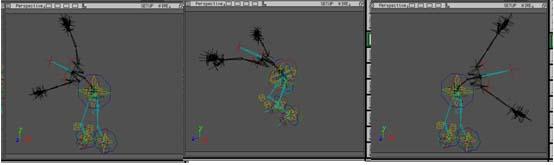
pic 7. Rotating the spine in different
angles.
Transform selections
Now for the best part. This is where XSI and "old" Softimage|3D make a difference. One of the golden functions that never made the transition over to XSI. And so far the setup isn't all that much different from other setups. Select one of the "move" icons. Go to "Info - Transformation Setup..."
![]()
pic 8. transformation setup
For my "move" icon I check the box for "trans - X,Y,Z - OBJ - DRG". For my rotation circle for the Y axis I check "Rotate - Y - OBJ - LCL". You should be able to figure out what to do with the rest. Now (make sure you are in Single mode) select different icons and you'll notice of Softimage|3D by it self changes the transformation tool.... and with the right axis in mind!!! wow! amazing :-).
Making a new hotkey
Last thing we now need is a new hotkey similar to the one you have in XSI.... eh... hmm... what you miss in Softimage|3D will apear in XSI, but what you miss in XSI you will find in Softimage|3D.... hehehe...
Oh well, we are going to make the "K" button our keyframe button. In the motion module you'll find something called:
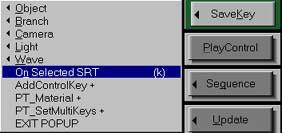
pic 9. Button K is binded to "On Selected SRT"
As default this command doesn't have a hotkey (or supra key in Softimage language). So go to Preferences - Keyboard Setup - Learn (or press "shift - F1"). The go to SaveKey - On Selected SRT, a new dialouge will popup.
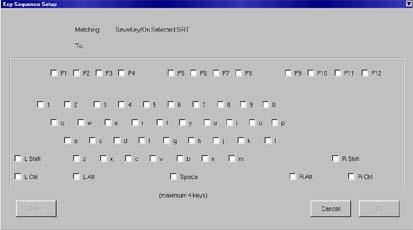
pic 10. keyboard setup for hotkeys
Check the box next to the K button and click OK. Now save this file where you can remember where it is. Each time you start softimage you have to manually load this preference. Or start softimage from the SI Command box with the option "soft -k D:\softimage\stefan.sks" (or what your file is named). Using the SRT will only save keys in the axis which you are working. If you are rotating the toes Y axis, only the Y axis will be keyframed. If you move the character only translation keys will be saved. All that with the magic button K.
What have we done?
To finish off this I just want to say.... "damn how easy animating
became!". You now don't have to worry about selecting transform or even
worry about what kind of axis you just saved your last key with. "You
pick" "You move/rotate" "You press K". It can't be easier than this, there
are no excuses anymore...
Stefan Andersson
Character Animator
Filmtecknarna F. Animation