| |
Planet3dArt interviews SOFTIMAGE|XSI guru Ed Harriss
more

Joy CG interviews SOFTIMAGE|XSI guru Ed Harriss
more
SoftImage interviews XSI guru Ed Harriss
more
CGChannel Interviews SOFTIMAGE|XSI
guru Ed Harriss
more
|
|
|
|

Its great that resources for XSI are starting to appear.
Two books have been released on the program, but none
of them cover the Rendertree, XSI`s new process for making
textures. Recently Ed Harriss, an old softimage pro, released
a set of training tapes aiming to introduce new users
and former Softimage 3D users to the texturing possibilities
in XSI. Lets see what Ed has to say. I have included
some images grabbed from the tape, click on them to get
a larger image. (They dont do justice to the videos image
quality though. The real tapes look much, much better.)
Presentation and Quality
Ed`s videos come on two VHS tapes. The first tape is split
into two sections, 'The interface basics' and ' Migrating
from Softimage 3X to softimage XSI'. The second tape contains
a set of 19 texturing projects.
 The picture quality on the videos are
excellent. The image appears crisp with little or
no blurring. More importantly, nearly all the text on
the interface is readable. Likewise, the sound quality
is also good. Some noise is present, especially in the
silent areas, but ist not very distracting. The picture quality on the videos are
excellent. The image appears crisp with little or
no blurring. More importantly, nearly all the text on
the interface is readable. Likewise, the sound quality
is also good. Some noise is present, especially in the
silent areas, but ist not very distracting.
Throughout the Videos Ed talk with a calm and informative
voice. You get in a very relaxed mood listening to him,
and he manages to hold your attention throughout the videos.
 Overall the visual presentation is well
thought out and clean. You get the feeling that these
videos were not rushed into production. Different sections
of the videos are separated by images/text and some moody
music. At the start of major sections Ed gives an introduction
to what he is about to cover in that section. Overall the visual presentation is well
thought out and clean. You get the feeling that these
videos were not rushed into production. Different sections
of the videos are separated by images/text and some moody
music. At the start of major sections Ed gives an introduction
to what he is about to cover in that section.
The interface basics
This is the first section on the video and deals with
basic interface elements associated with texturing and
mapping. Ed approaches this section as if you are completely
new to XSI. In a short indroduction to XSI he start with
an explanation of the interface and how to handle different
views, like the explorer and the property editor.
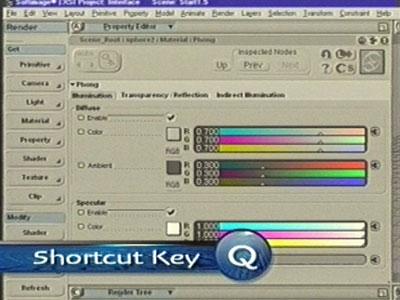
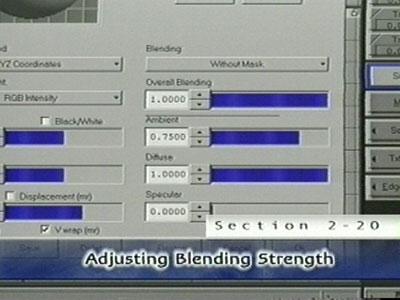
 Ed quickly moves on to explaining all of
XSI`s available materials. As well as explaining the cons
and pros of each material, he covers all the parameters
for each material. Useful shortcuts and general functionality
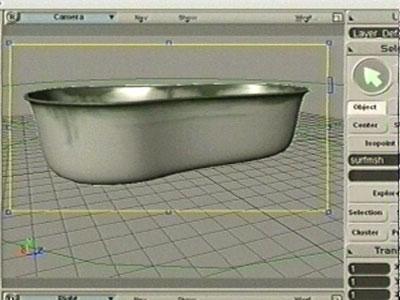
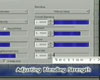
are also covered. While showing the materials, the render-region
is introduced, and this plays a big part on these tapes.
Because the render-region updates in near real-time, you
can see both the sliders and the results they produce
instantly. Ed quickly moves on to explaining all of
XSI`s available materials. As well as explaining the cons
and pros of each material, he covers all the parameters
for each material. Useful shortcuts and general functionality
are also covered. While showing the materials, the render-region
is introduced, and this plays a big part on these tapes.
Because the render-region updates in near real-time, you
can see both the sliders and the results they produce
instantly.
While talking, the camera zooms into areas of interest.
Also notable is the way onscreen clues are used to make
sure you are looking at the right parameters. Clues include
a pointing hand and transparent areas appearing over the
parameters discussed.
 Its worth noting that the Rendertree is
not covered until later on. Where things get a bit complicated,
Ed refers to this later section. For a beginner, the progression
of the video is nice, covering the basics first and then
moving on to real projects. Its worth noting that the Rendertree is
not covered until later on. Where things get a bit complicated,
Ed refers to this later section. For a beginner, the progression
of the video is nice, covering the basics first and then
moving on to real projects.
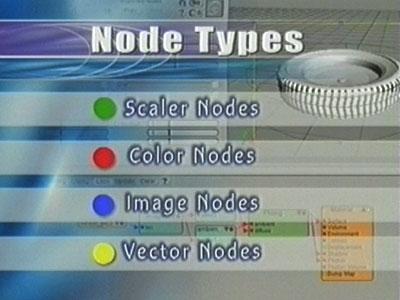
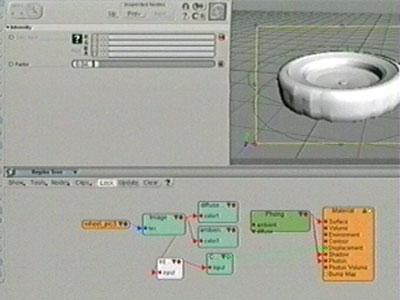
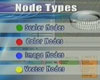 When starting on the Rendertree, Ed starts
by explaining the general usage, shortcuts and handling
of the most common nodes. As before, this is done in detail.
You should quickly get a feeling for how the Rendertree
operates. Still, this is just the basics, don't expect
to become an expert after watching this section. Consider
it more like an introduction. More advanced uses are discussed
in the project section on tape 2. When starting on the Rendertree, Ed starts
by explaining the general usage, shortcuts and handling
of the most common nodes. As before, this is done in detail.
You should quickly get a feeling for how the Rendertree
operates. Still, this is just the basics, don't expect
to become an expert after watching this section. Consider
it more like an introduction. More advanced uses are discussed
in the project section on tape 2.
Section one is ended by a brief explanation on how to
apply texture supports to objects. These include planar
and cylindrical projections.
Migrating from Softimage 3X to softimage XS
The main purpose of this section is to show the differences
between texturing in Softimage 3D and XSI. The section
is well planned out. Ed shows how to do a specific operation
in Softimage and then switching over to XSI to give you
the same functionality. Because of XSI`s complex nature,
the differences can be quite significant.
 Despite its name, this section is not just
for those in transition. Many of the operations shown
are not available anywhere else on the video, so make
sure you don't skip this part. Actually, this is probably
the most informative part of the videos. Despite its name, this section is not just
for those in transition. Many of the operations shown
are not available anywhere else on the video, so make
sure you don't skip this part. Actually, this is probably
the most informative part of the videos.
This section is somewhat more fast-paced than the first
section, as all of Softimage`s texture controls are covered.
The pace was actually more to my liking, as the first
section can seem a bit slow if you already have some experience
with the program. Where more explanation is needed Ed
refers to a specific project in the project section.
Projects
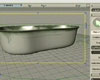
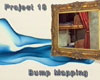
The projects start on tape 2, where Ed takes you through
19 examples of texturing. Each project starts with a still
telling you what is covered and an image of the final
rendering.
01. Bump Maps
02. Local Materials
03. Displacement Mapping
04. Texture Support Sharing
05. Procedural Bump Mapping
06. Animated Materials
07. Animated Textures
08. Constant Materials
09. Specular Mapping
10. Box Mapping
11. Double Sided Shader
12. Texture Blending
13. Decal Mapping
14. Glass Shader
15. Reflection Mapping
16. Texture Cropping
17. Dirt Maps
18. Transparency Mapping
19. Alpha Blending
 Most of the projects are very good, but
some are a bit similar in nature. For instance, several
projects cover the use of alpha channels in images in
one way or the other. While showing several uses, I felt
that some of these projects could have been replaced.
I`m not sure this is Ed`s fault however. While different
mapping methods like specular and dirt-mapping produce
different results, the approach is almost identical. Most of the projects are very good, but
some are a bit similar in nature. For instance, several
projects cover the use of alpha channels in images in
one way or the other. While showing several uses, I felt
that some of these projects could have been replaced.
I`m not sure this is Ed`s fault however. While different
mapping methods like specular and dirt-mapping produce
different results, the approach is almost identical.
 Also, while this is a tape for beginners
I was expecting some more advanced projects covering a
wider variety of the Rendertree`s different nodes. As
it is, only the basic nodes are shown. The glass shader
project stands out as a bit more advanced, showing how
to get good results from the incidence node . Also, while this is a tape for beginners
I was expecting some more advanced projects covering a
wider variety of the Rendertree`s different nodes. As
it is, only the basic nodes are shown. The glass shader
project stands out as a bit more advanced, showing how
to get good results from the incidence node .
These issues aside I`m sure many will find this section
very rewarding and informative, I know I did. If you are
a beginner you will quickly get a good grasp of how to
best texture your own objects in XSI. As well as the videos,
the package also includes a CD with all the project`s
scenes and images. This way you can try out the different
techniques yourself while watching the video
Conclusion
These set of videos are so well produced and presented
its hard to  criticize them. Its clearly stated that
these tapes are targeted at the beginners and that's where
the videos shine. The pace and progression seems right
and the information covered will get you well on your
way to mastering materials in XSI . If you can afford
the tapes ($149.95 for NTSC and $169.95 for PAL), I say
go for it. criticize them. Its clearly stated that
these tapes are targeted at the beginners and that's where
the videos shine. The pace and progression seems right
and the information covered will get you well on your
way to mastering materials in XSI . If you can afford
the tapes ($149.95 for NTSC and $169.95 for PAL), I say
go for it.
For the more experienced users, this might not be the
tape for you. There is a good chance that you will already
know most of the areas covered by Ed. Still, the tapes
are entertaining, so again, if you can afford it, you
could do a lot worse than ordering a copy.
Robert
Ryan is the webmaster of CGChannel, you can contact him
at robert@cgchannel.com
|
|
 |